![Untitled design (3)-1.png]](https://support.toughcommerce.com/hs-fs/hubfs/Untitled%20design%20(3)-1.png?width=40&height=40&name=Untitled%20design%20(3)-1.png)
A flag is a small visual marker you attach to a customer's account to highlight something your team needs to know at a glance — for example, a delivery preference, a billing note, or anything else that affects how you handle that customer. Once applied, a flag shows up automatically in every place that a customer appears across the Tough Commerce Dashboard. Flags are visible and can be applied by all dashboard users on your team.
Flags appear in six places:
- The Customer page
- The Customer Profile page
- The Dispatch Orders page
- The Order Create page
- The Order Review pages
- Finance pages (shown when you hover over the customer's name)
You can apply an existing flag — one of the previously created flags — or create a custom flag with your own name and color. This article walks through both.
How to create and add a custom flag
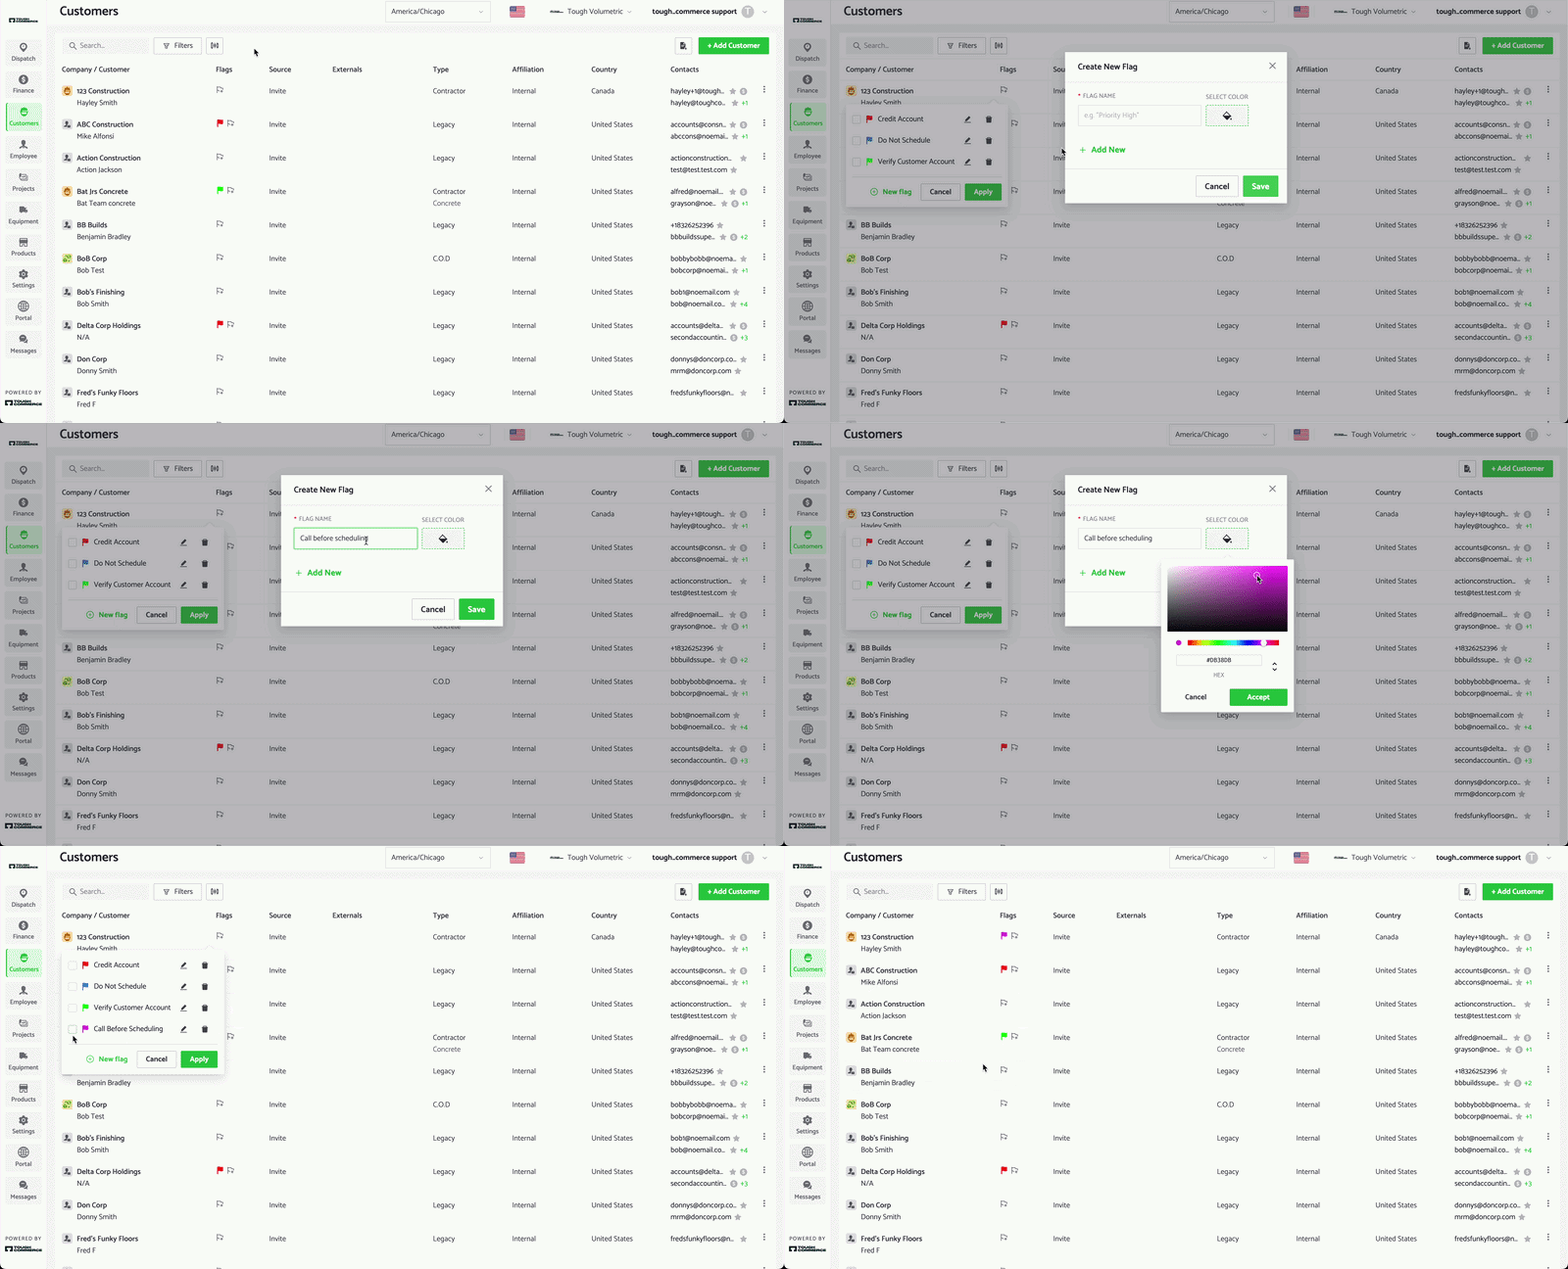
- In the left-hand navigation bar, click Customers.
- Find the customer you want to flag.
- Click the new flag icon next to that customer’s name, in the Flags column.
- In the pop-up window, select New Flag.
- Type a name for your flag in the name field.
- This name is how you and your team will identify the flag going forward, so make it short and clear (for example, "Signature Required" rather than a long sentence).
- Click the paint can icon to choose a color for the flag, then click Accept.
- Click Save.
- Saving creates the flag, but it doesn't apply it to the customer yet — you still need to select and apply it.
- Tick the box next to the new flag you just created from the list.
- Click Apply.
The flag appears immediately in all six locations listed above.
Tip: Because custom flags are saved platform-wide, the next time you need this same flag on a different customer, you can follow the instructions for existing flags, select your existing flag from the list, and click Apply — no need to recreate it. All dashboard users for your business will see and have access to flags.
How to add and remove an existing flag
- In the left-hand navigation bar, click Customers.
- Find the customer you want to flag.
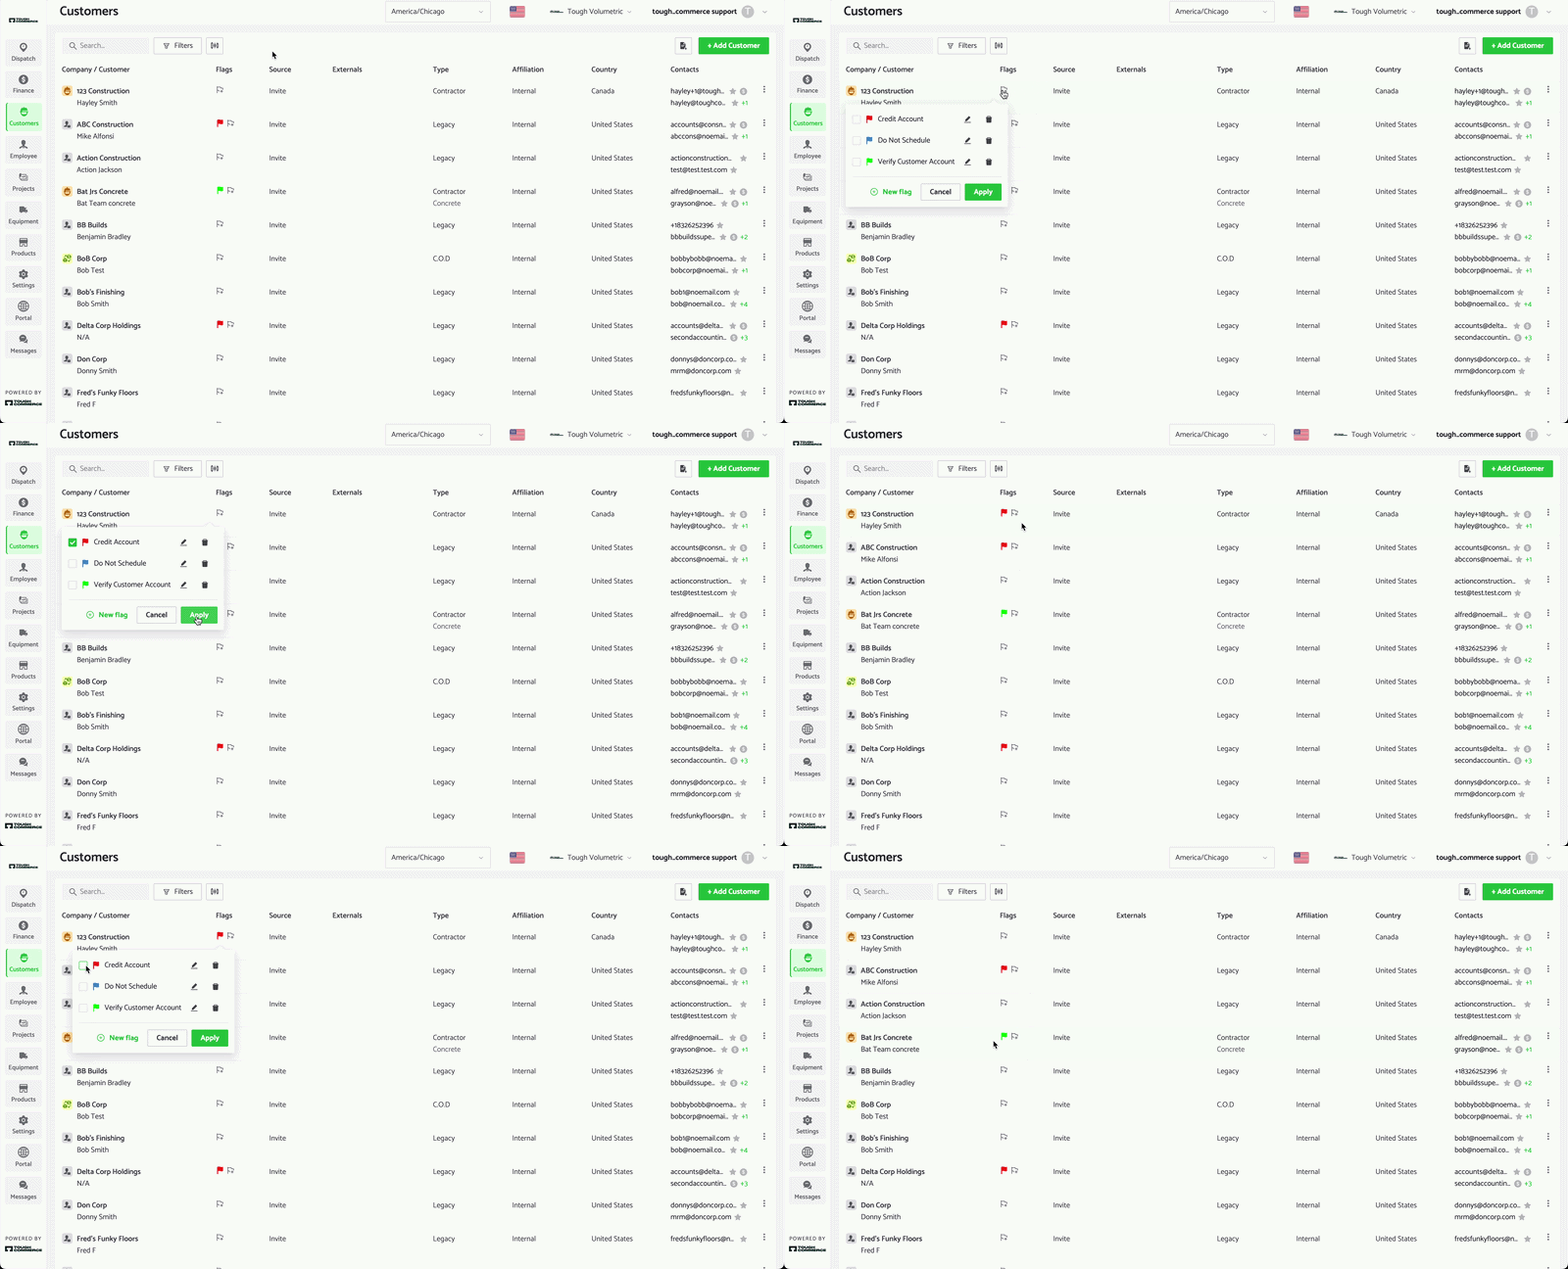
- Click the new flag icon next to that customer’s name, in the Flags column.
- To add: In the pop-up window, tick the box next to one or more of the existing flags from the list.
- To Remove: In the pop-up window, un-tick the box next to one or more of the existing flags from the list.
- Click Apply.
Editing or deleting a flag
You can edit or delete a flag at any time.
Please note: Editing a flag updates it everywhere it's already been applied — since a flag isn't specific to one customer, changing its name or color changes it for every customer and order it appears on.
To edit a flag:
- In the left-hand navigation bar, click Customers.
- Find the customer with the flag you want to edit.
- Click the new flag icon next to the customer’s name, in the Flags column.
- In the pop-up window, select the pencil icon.
- Type a new name for your flag in the name field.
- Click the paint can icon to choose a new color for the flag, then click Accept.
- Click Save.
To delete a flag:
Please note: Deleting a flag removes it everywhere it's been applied — from every customer and every order it appears on. It cannot be recovered once deleted, and no one is notified when this happens. Before deleting a flag, make sure you're not removing information your team still relies on.
- In the left-hand navigation bar, click Customers.
- Find the customer you want to remove a flag from.
- Click the new flag icon next to that customer’s name, in the Flags column.
- In the pop-up window, select the Trash icon
- In the “Are you sure to delete this flag?” pop up, select Yes
The flag will then be permanently deleted from all of your customers.